Across many schools today, principals and teachers are asking an important question: How do we move beyond textbook learning and help students truly experience science? The answer often lies in creating a STEM lab or makerspace where students can experiment, design, build, and present their ideas.
One afternoon in a classroom, a teacher placed simple materials on the table—cardboard sheets, glue, chart paper, sand, charcoal, and a plastic bottle. The teacher asked a simple question: "How can we clean dirty water using materials around us?"
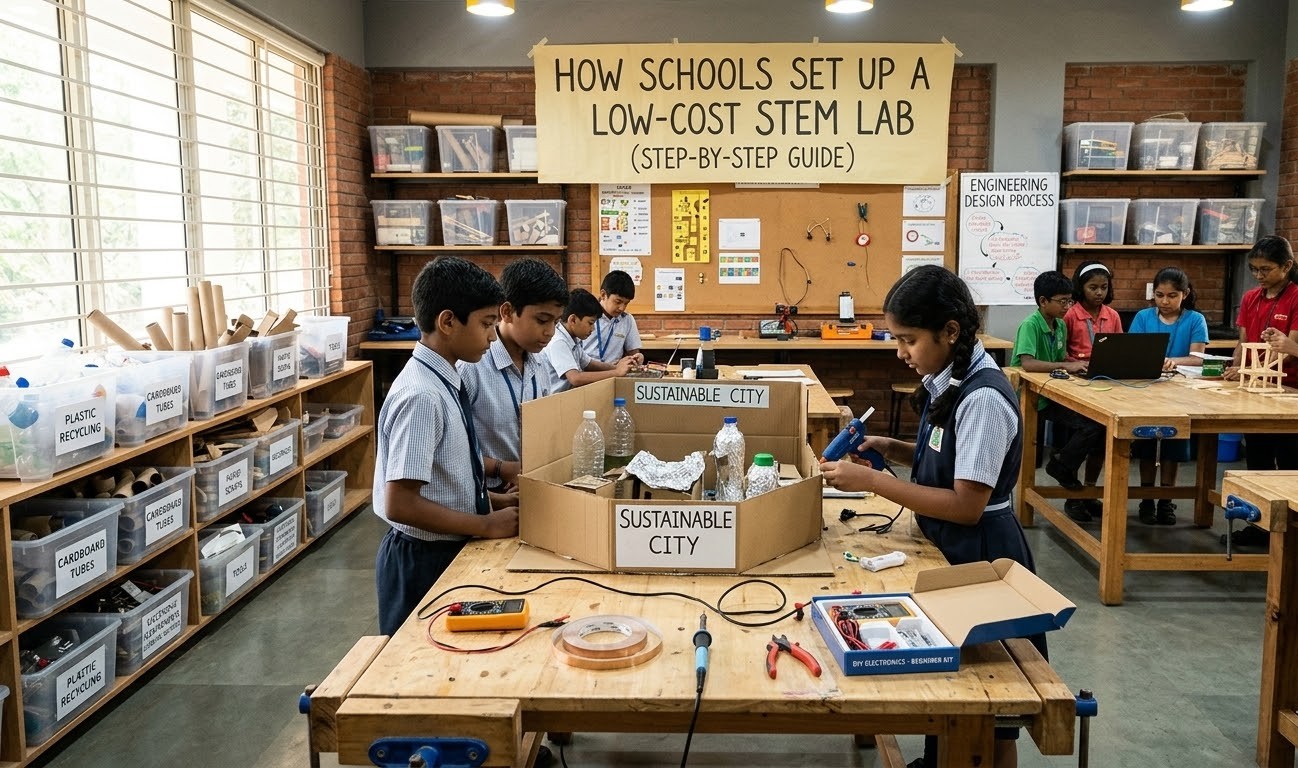
Immediately the classroom came alive. One group started layering sand and charcoal inside the bottle. Another group drew a chart explaining the filtration process. By the end of the session, the students had not only learned about filtration—they had designed, built, tested, and explained a working system. This is exactly what a STEM lab should look like.
Many schools believe setting up such a space requires expensive technology. In reality, a powerful STEM learning environment can begin with simple materials, thoughtful planning, and structured activities. Here is a practical step-by-step approach schools can follow.
Step 1: Identify Learning Goals
Before setting up a STEM lab, schools should first define their learning goals. Every school can create its own investment plan and learning roadmap based on student grade levels:
- Primary Grades (Classes 1–3): Focus on observation-based learning and simple model building.
- Middle Grades (Classes 4–7): Explore physics demonstrations, chemistry experiments, and structured projects.
- Senior Grades (Classes 8–10): Work on complex innovation challenges and design thinking projects.
Step 2: Identify Essential Equipment and Materials
A low-cost STEM lab does not require sophisticated equipment. It needs a mix of basic tools, building materials, and simple electronics.
Basic Tools and Building Materials
Students need tools to measure, cut, and assemble. Examples include scissors, rulers, screwdrivers, and cutting mats. For joining parts, include white glue, glue guns, and various tapes. These allow students to build everything from bridge models to mechanical arms.
Stationery and Art Supplies
Before building, students must plan. Chart papers, markers, and sticky notes are essential for sketching designs. Use art materials like cardboard, craft sticks, and paper cups to build models of the solar system or windmill systems.
Science Experiment Supplies
Include safe chemicals like baking soda, vinegar, and citric acid for chemistry demonstrations. For physics, stock up on magnets, pulleys, wheels, and axles to demonstrate motion and force.
Simple Electronics
Introduce basic electronics using LEDs, batteries, switches, and small motors. These help students understand the fundamentals of electricity and circuits by building doorbells or motor-driven systems.
Step 3: Integrate STEM with the School Curriculum
A STEM lab becomes meaningful only when connected with classroom learning. Density experiments should support physics lessons, and chemical reactions should reinforce chemistry concepts. This ensures STEM learning strengthens academic understanding.
Step 4: Train Teachers for Hands-On Learning
Even the best lab will not succeed without confident teachers. Training programs help educators learn how to facilitate design challenges and manage project-based activities effectively. At ScienceUtsav, we provide specialized teacher training workshops to bridge this gap.
Step 5: Create Structured STEM Activities
Consistency is essential. Schools should schedule weekly sessions for hands-on experiments, innovation challenges, and project presentations. Over time, this creates a culture where students naturally develop creative problem-solving skills.
How ScienceUtsav Supports Schools
ScienceUtsav works with schools to create hands-on STEM environments through structured activity kits, innovation labs, and electronics learning kits. These programs help schools introduce STEM education in a way that is practical and aligned with curriculum goals.
Conclusion
A powerful STEM lab does not require expensive machines. With the right tools, supplies, and a structured plan, any school can create a space where science becomes a journey of curiosity, creativity, and innovation.